|
Fly of
the Month
Bob Ireton brings together his
experience in fly fishing, aquatic entomology, and knowledge of fly
tying techniques and materials, to design and tie durable and
effective flies.
|
|

Volume 6, Issue 3
March 2005
AQUATIC SOWBUG
Fly, Text, and Photography by Bob Ireton
Crustaceans are one of the three major
groups of trout food. The other two are aquatic insects, and fish. A
high quality stream or lake will usually have good numbers of
crustaceans. The most recognizable is the crayfish, but the scud and
sowbug are a close second. Crustaceans are highly nutritious, and the
great flavor and orange red color of wild trout is largely due to these
crustaceans.
Aquatic sowbugs, sometimes known as
cressbugs or pillbugs, closely resemble the terrestrial variety that I
am sure we all have seen. They have a flattened body with seven pairs of
legs that extend at right angles from their sides. They also have a pair
of long antennae, and two short, flaplike tails. They measure 5 to 20 mm
when mature. Although sowbugs are found in slow water, they are easier
to imitate in flowing waters, where they get disconnected from the
bottom, and drift along.
MATERIALS
Hook – TMC 2457, Daiichi 1150, or
Dai-Riki 135.
Size – 10-16.
Base Thread – Gray Uni 3/0.
Weight - .025 Lead wire.
Working Thread – Gray Uni 6/0.
Tails – Gray biots, approx. 4mm long.
Back – Gray latex body material, trim to with of body, approx.
4mm.
Rib – 5X tippet material.
Body – Sowbug gray SLF dubbing.
Antennae –Canada Goose primary feather fibers, approx. 12 mm
long.
TYING STEPS - click on
pictures for larger view
|
1 – As always, place the hook properly in
the vice. Pinch down barb, if desired. This can be done now, or before
it is placed in the vice. For this fly, I am using a size 10, TMC 2457.
Attach the 3/0 thread behind the hook eye, and lay on a good base,
stopping at a place on the hook shank that is even with the hook eye.
Wind the lead wire on the mid half of the hook shank. I like to keep my
lead wire on a bobbin made for that purpose. Not only is it easier, but
also saves on wasted lead wire. Leave the weight hanging at this point. |
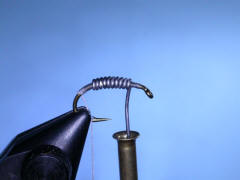 |
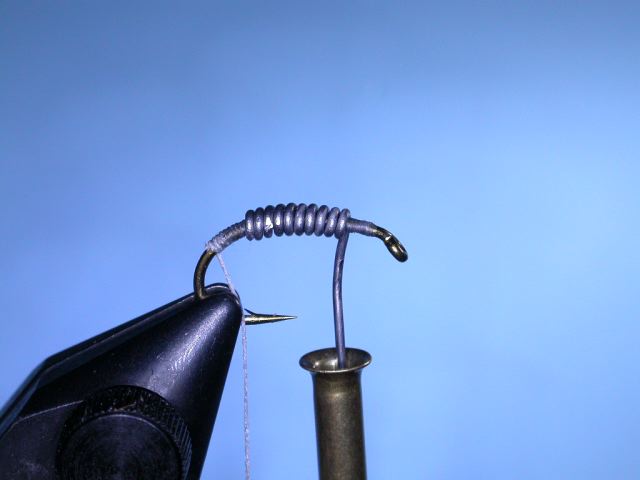
| 2 – Continuing with the lead
wire, make a horizontal loop around the lead, and cut off the working
lead wire. We are going to make a flattened body, which is difficult to
do on a fly. This step, and the next, will make a somewhat flattened
body that if not excessively thick. |
 |
|
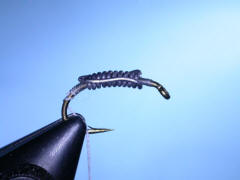
3 – Now cover the lead with the 3/0 thread,
building a thread ramp on each end of the lead. When this is completed,
tie a half hitch, and a whip finish, then remove the 3/0 thread. Using a
flat, smooth jawed pliers, carefully flatten the thread covered lead,
forming the body. The thread helps to keep the lead wire in shape. Coat
the body with Dave’s flexament, which will lock everything in place, and
leave a nice base for the rest of the fly. |
 |
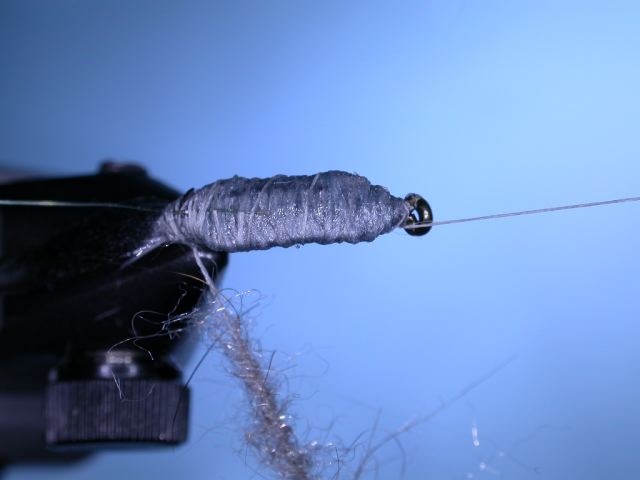
| 4 – Attach the 6/0 working
thread, and tie in the biots for the tail. Tie a half hitch |
 |
|
5 – Tie in the tippet material for the rib.
Tie a half hitch. Trim the latex material to the width of the body, and
tie in. Tie another half hitch. |
 |
6 – Form a dubbing loop, add the dubbing,
and twist the loop to form a dubbing rope. Bring the working thread
forward, and tie a half hitch behind the hook eye.
|
 |
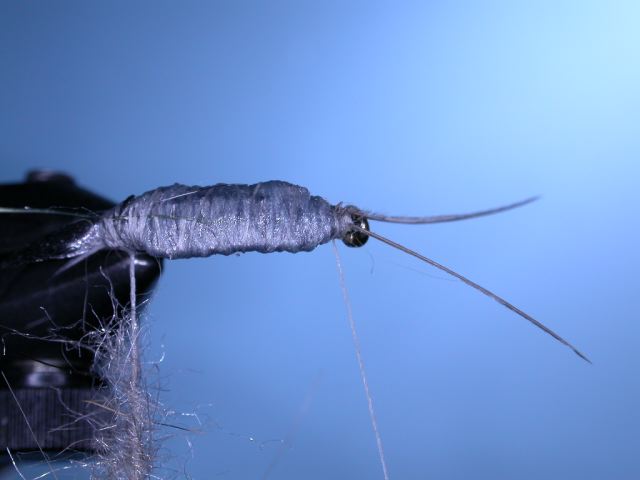
7 – Snip off a couple of fibers from the
Canada Goose primary feather. They just happen to match the color of the
dubbing. Tie one in on each side of the hook, behind the hook eye. Snip
off the excess fibers, and tie a half hitch.
|
 |
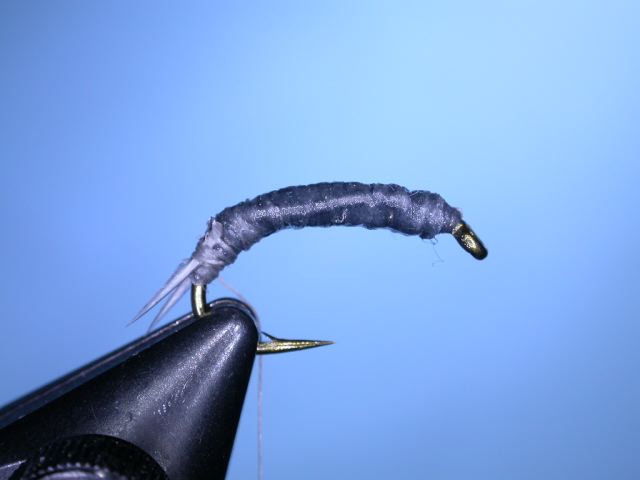
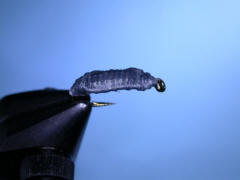
8 – Palmer the dubbing rope forward to form
the body. A rotary vice makes this step much easier and faster. Tie off
the dubbing, and snip off the excess. If your rope was too short, just
tie it off, and form another one to finish up. Now tie a half hitch.
|
 |
9 – Bring the shell material forward, and
while holding it under slight tension, tie off using the ‘pinch method’.
Snip off the excess material, and tie a half hitch.
|
 |
|
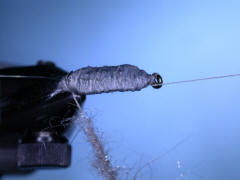
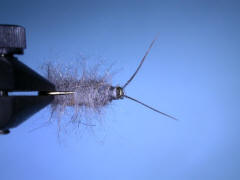
10 – Palmer the tippet material forward to
form the segments. As you do this, using the bodkin, separate the
dubbing so it won’t be tied down. Secure the tippet material, snip off
the excess, and tie a half hitch. Form a head, tie a half hitch, then a
whip finish. Snip off the working thread, and apply head cement . This
view is looking down on the top of the fly. |
 |
|
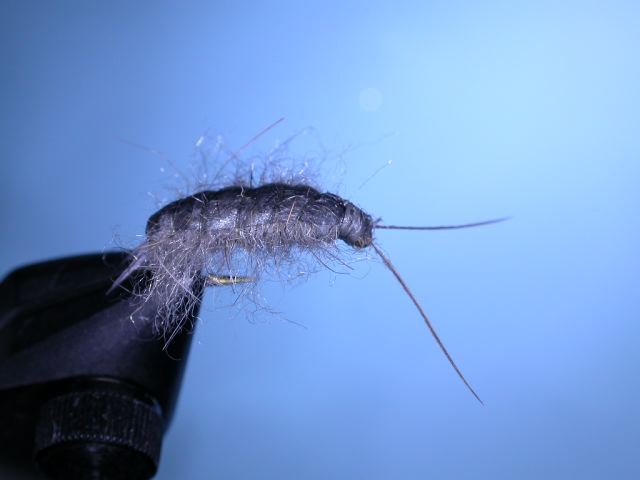
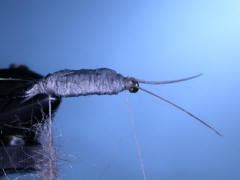
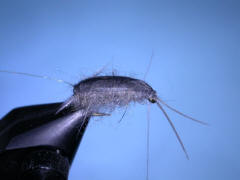
11 – Using a dental ‘root canal’ tool, or a
pick of some kind, pick out the dubbing horizontally on each side of the
body to form the legs. This view is looking at the bottom of the fly. |
 |
|
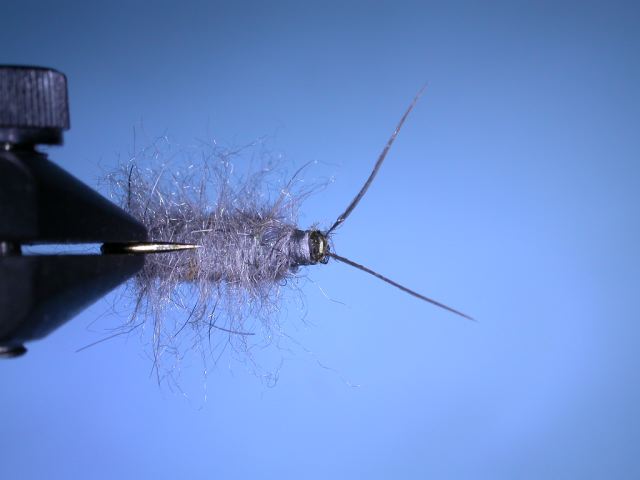
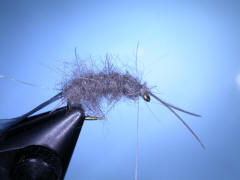
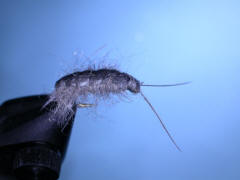
12 – Make any final adjustments to the
dubbing, etc. Trim as needed. |
 |
© 2005 Robert R. Ireton, II
www.buckeyeflyfishers.com
Site designed and maintained by
Panfalone@fuse.net
|